Realiza algunos cambios en el entorno mundial
La máquina que ha comprado le reportará beneficios, pero también cambiará indirectamente el medio ambiente mundial y dará a los residuos plásticos una oportunidad de aprovechamiento.

Realiza algunos cambios en el entorno mundial
Ever wondered about boosting your DIY projects with plastic gourds? Our guide shows you cómo atar un cordel a una calabaza de plástico. It opens up endless creative options. You can make home decor or intricate art pieces. Learning this skill brings a new level to your art projects.
Explore the art possibilities of plastic gourds with our detailed guide. It’s perfect for newbies and experienced crafters. We share unique methods and creative ways to improve your DIY gourd crafts. Also, we emphasize the cleverness and detail in our techniques. This reflects our dedication to innovation and top quality. For instance, making instruments like shekeres or traditional gourd maracas teaches valuable lessons for your DIY projects12,).
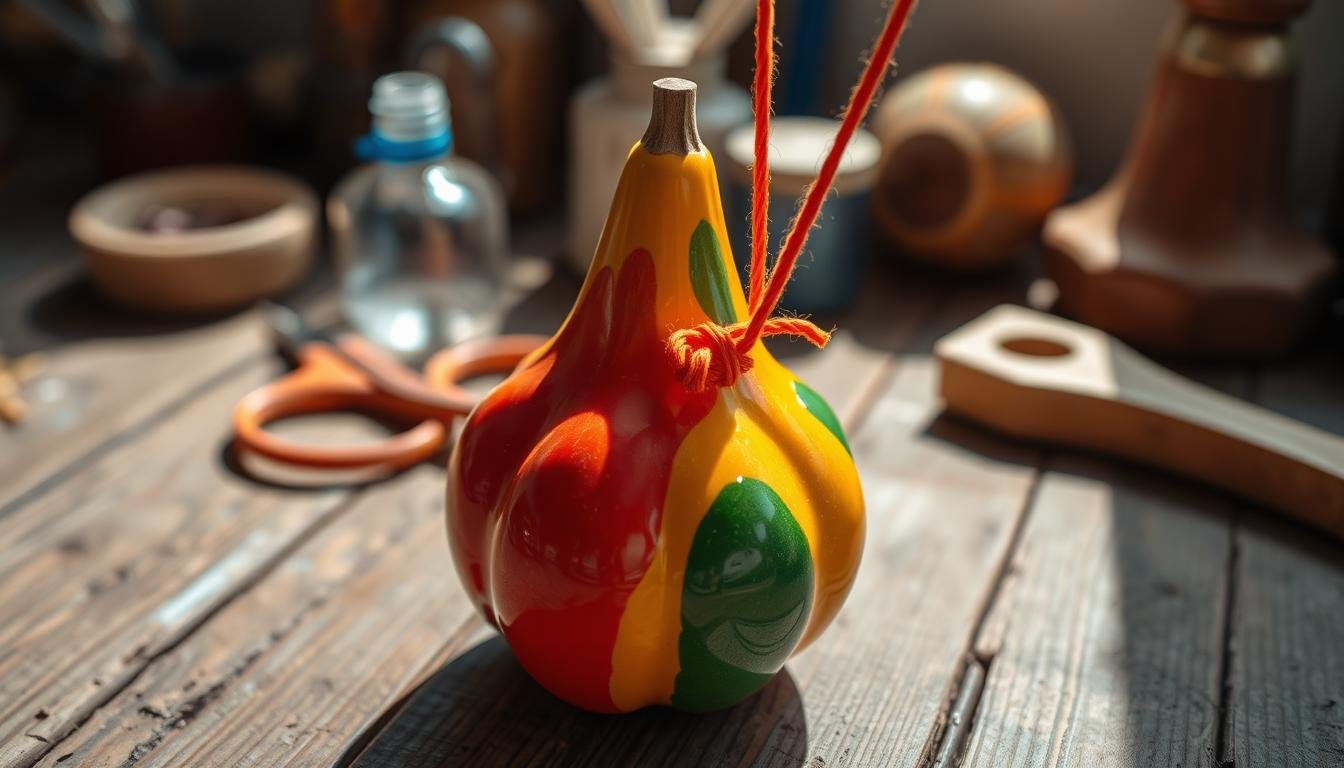
To tie a string on a plastic gourd, you’ll need a few key items. These materials make sure your project lasts long and looks good.
First, choose the right plastic gourd. Opt for gourds like birdhouse types, which are mostly water when picked. They need weeks to dry3. Once dry, they’re ready for crafting.
Use strong, quality string or twine for the gourd. You’ll need about 80 feet of No. 15 or No. 18 twine for full coverage4. Or, reuse string from plastic bottles for an eco-friendly option5.
You must have sharp scissors for cutting twine. Precise cuts ensure the gourd looks neat and stays strong.
A drill makes holes in the gourd for the string. Choose the right drill bit and be safe.
These materials are crucial for tying string on gourds. To learn about recycling for such projects, check the Guía de reciclaje del PVC4.
When choosing plastic gourds for your DIY project, it’s important to look at the type and size. This guide will help you make the best choice for your needs.
There are many kinds of plastic gourds, taking inspiration from natural ones. You can find decorative birdhouse gourds and Tennessee spinning gourds, each with their own look and use. Foam pumpkins, which are sold in various sizes, can be easily found and are great for lots of projects, like home decorations and crafts6. These plastic gourds are perfect for getting creative, thanks to their strength and easy handling.
The size of your plastic gourd should fit what you’re planning to do with it. Picking the right size affects how your project turns out and works. For example, using thick yarn might mean you need a bigger hole in the gourd6. Knowing this helps you plan better and work more effectively.

Proper cleaning and getting the surface ready are key for the string to stick to the plastic gourd well. Using the correct supplies and methods makes this task quick and successful.
First, collect these items to clean plastic gourds:
Use these steps to make sure your plastic gourd is cleaned well:

After it’s clean, the next thing is gourd surface preparation. This means making the surface rough so the string sticks better. Here’s how to prepare a plastic gourd for crafts:
By doing these steps, your plastic gourd will be prepared for crafting and decorating. It will be strong and look great78.
Learning how to tie string on gourd involves various string tying techniques. These methods ensure a secure and good-looking finish. Let’s explore the common methods that suit different crafting levels and styles.
The basic knot is a great place to start. First, cut the string to the length you need, leaving extra for knots. Wrap it around the gourd and make a simple overhand knot. Pull it tight, then cut off any leftover string.
For something fancy, try the plastic pumpkin string knot. Drill holes in the gourd to thread the string through. This technique makes the gourd more visually interesting. Find more decorative ideas in “Crafting with Gourds” by Lora S. Irish, offering many crafting tips9.
The decorative wrap is another great method. Crisscross the string around the gourd and tie it at different places. Besides keeping the string in place, it makes your project look unique. You can also add beads or jingle bells for a fun touch10.
Adding beads to your string ties beautifies your project and can make a gourd musical instrument, like a shekere. Most shekeres have decorative beadwork10. These tips help make your gourd both useful and appealing.
We like using Nylgut® strings for gourd instruments because they last a long time. They simulate nylon well and work great for specific tunings11.

Different string tying techniques mastered will result in both functional and lovely outcomes. Whether it’s a simple plastic pumpkin string knot or a complex beaded shekere, choosing the right approach is key. This foundation will elevate your craft project.
| Técnica | Descripción | Lo mejor para |
|---|---|---|
| Basic Knot | Overhand knot for securing string | Simple projects |
| Plastic Pumpkin String Knot | Drilled holes with woven string | Decorative art |
| Decorative Wrap | Crisscross pattern with knots | Coras |
| Beaded String Knot | Use of beads for functional enhancement | Musical instruments |
Estos string tying techniques ensure your plastic gourd projects look great and stay secure. Knowing how to properly tie string on a gourd can lead to more rewarding craft projects. This knowledge opens the door to innovative creations.
When picking out the string for gourd tying, think about the material, how long it lasts, and how strong it is. Making the right choice helps make sure your craftwork lasts a long time. This is true whether you’re making something useful or just for looks.
Different strings work best for different kinds of gourd decorations. Here are some common ones:
Choosing the right string or twine makes your project tough and long-lasting. Nylon and hemp are some of the strongest. They can handle weight and tension without failing12. This is really important for things like musical instruments that have to stay tied tightly12.

When tying gourds or setting up vertical gardens, you need strong twine. Using strong materials like solid cardboard, plastic bottles, and metal hangers makes your gourd crafts both useful and pretty7.
Thinking about these things helps us pick the right string for each project. We make sure it looks good, works well, and lasts a long time.
When you drill holes in plastic gourds, you need to be careful and precise. It’s important to pick the right drill sizes and types for the job. Let’s look at the best ways to do this without damaging the gourd.
Finding the right drill bits is key for neat and accurate holes in plastic gourds. We suggest using sharp drill bits, sizes between 1/8 and 1/2 inch, based on the hole size you need. Choosing the correct drill bit size helps avoid cracks and keeps the gourd strong.
Different projects might need various drill types, just like with dried gourds. For making a gourd banjo, you would use different tools. This includes a handsaw and a variety of drill bits for precise holes. Using the right tools is important to not damage the gourd13.
Safety is super important when drilling. Here’s how to keep it safe and do a good job:
By following these safety tips, drilling in plastic gourds can be safe and efficient14.
Gourds come in shapes like dipper, snake, and bottle, each with its own drilling challenges. Knowing what your project needs helps pick the right drilling methods15.
Stick to these guidelines to drill in plastic gourds safely, keeping the quality intact and yourself safe.
Learning how to tie strings in different ways is key for making your plastic gourd projects better and cooler. Let’s learn step-by-step how to tie strings for different gourd projects.
First, let’s start with a basic knot. This is the base for more complex patterns. Choose a small to medium weight cord, so your project doesn’t fall apart16. Here’s your starting point:
The Jug Knot is a favorite for gourd projects because it keeps the gourd’s neck in the middle of the knot. It’s great for both carrying and hanging your gourd16. Follow these steps for tying it:
If you want to make your project pretty, try some basic weaving. Start at the top and weave the string over and under across the gourd. Change how tight you pull the string to make a cool texture. Keep weaving until you’ve covered the whole gourd and there are no empty spots.
Going beyond the simple knots adds more to your project. Try using trussing or different hanging knots like the Barrel Knot or square knot. These add to both how useful and how good your gourd stringing project looks16. Try out various knots and styles to see what you like best.
By learning these string tying methods, you’re not just making something useful. You also save a lot of money. For example, making a musical instrument called a shekere out of a plastic bottle and beads can save you about $18-23 over buying one17. If you make a gourd shekere, you might save between $32-5217.
With these skills, you save money and enjoy making something unique and personal.
Making a plastic gourd look fantastic can be fun and rewarding. You can make your gourd stand out with different art styles. Let’s see how painting and adding beads and charms can make your gourd look great.
There are so many ways to paint a plastic gourd. You can start simple with solid colors or stripes, then try more complex designs like flowers or patterns. The best decorating results come from picking the right colors and using good quality paint. Acrylic paints work well because they stick to plastic and are bright. A primer can help the paint stick better and last longer.
If you want your gourd to really stand out, think about using nature or cultural themes. Painting your gourd like a pumpkin for Halloween or adding some sparkle can make it look special.
Using beads and charms lets you add a personal touch to your gourds. You can put beads on the string around the gourd or glue them on. Charms can make your gourd fun and match its theme. This is also a great way to use old jewelry and be kind to the environment.
Beads and charms don’t just make the gourd look good. They also make it fun to touch. This can make your gourd a great decoration inside or outside.
In our line of work, making things look good and unique is key. Just like our PVC braided hoses are strong and useful in many places like cars and farming industries, your decorating should also show creativity and care18. By decorating your gourds in special ways and adding beads and charms, you can turn something simple into something amazing.
String-tied plastic gourds offer many creative uses. They’re great for adding flair to your home and outdoor areas. Plus, they’re fun DIY projects for kids.
String-tied gourds are perfect for home decor. You can paint them or add beads to match your style. They bring a rustic feel to any room.
These gourds are ideal as living room accents, kitchen decorations, or dining table centerpieces. Their unique look grabs everyone’s attention.
These gourds also make excellent outdoor decor. Hang them from trees or pergolas using strong string. This creates a charming atmosphere in your outdoor space.
You can paint them in bright colors or patterns. It’s perfect for holidays like Halloween or for summer parties.
Kids will love making DIY gourd projects. They can paint and decorate gourds, learning about different crafts. They can also make simple bird feeders.
Turning dried gourds into maracas is a fun idea. Kids can explore the cultural importance of gourds in music, like the West African shekere19. For more on making musical instruments, see esta guía.
Repurposing plastic materials into string-tied gourds is an eco-friendly choice. For more industry insights, check out the Conical Twin Screw Extruder Granulator. It’s known for efficient plastic recycling. Learn more aquí20.
As we wrap up our guide, let’s review the key steps in tying a string on a plastic gourd. We’ve covered choosing the right gourd and getting it ready for crafting. Cleaning the gourd gives us a clean surface for decorating and removes any dirt.
When picking out string or twine, think about the types, how strong they are, and if they’ll last. Making exact holes is crucial for a stable and easy tie. It’s also very important to be safe and accurate with tools like drills. With the string-tying methods we’ve discussed, you have a full guide on getting a clean and secure finish.
You can also get creative by painting your gourd or adding beads or charms. This creativity makes your craft unique. The string-tied plastic gourd can be used for many things, like home decor or fun DIY projects for kids. This guide aimed to give you the skills and confidence to start your gourd crafting adventure. Remember, the gourd has a long history, especially in West Africa where it was used to make musical instruments21. As you begin your craft, we hope you’ll find joy in creating beautiful, lasting decorations.